Harnessing Micro-Interactions in Webflow to Boost User Engagement on Niche E-Learning Sites
In the world of e-learning, especially in niche subject areas, user engagement can make or break the success of your platform. One…
In the world of e-learning, especially in niche subject areas, user engagement can make or break the success of your platform. One often-overlooked design technique that can dramatically impact user satisfaction is the use of micro-interactions — small, intuitive animations or responses that guide learners through each step of the learning experience. By implementing micro-interactions in your niche e-learning site, you can help students stay focused, reinforce desired behaviors, and transform passive visitors into engaged participants. In this article, we’ll discuss why micro-interactions matter and how you can build them effectively in Webflow.
What Are Micro-Interactions and Why Do They Matter?
Micro-interactions are small design elements that respond to user inputs or system changes with brief, visually engaging feedback. Examples include a button that changes color on hover, a subtle bounce when a user completes a quiz, or a progress bar that animates to indicate that a lesson is loading. These small moments can improve usability, reduce user frustration, and create a sense of delight that keeps learners coming back.
Benefits of Using Micro-Interactions in E-Learning
- Increased Engagement: Interactive elements hold learners’ attention and make site navigation feel more natural.
- Immediate Feedback: When students get instant feedback on their actions, they’re more likely to persist in the learning process.
- Positive Reinforcement: A fun animation or celebratory icon can motivate users to keep moving through lessons.
- Enhanced User Experience: Micro-interactions help guide learners by signaling next steps or highlighting available features.
Why Focus on Niche E-Learning Sites?
Niche e-learning platforms face unique challenges. The topics may be highly specialized (e.g., an online course on advanced cheese-making techniques or a platform teaching a lesser-known coding language), meaning that learners are often equally specialized and seek a tailored, intuitive learning experience. Micro-interactions create a more tangible and immediate sense of progress and reward — perfect for learners who need subtle cues and reassurance that they’re on the right track.
Getting Started with Micro-Interactions in Webflow
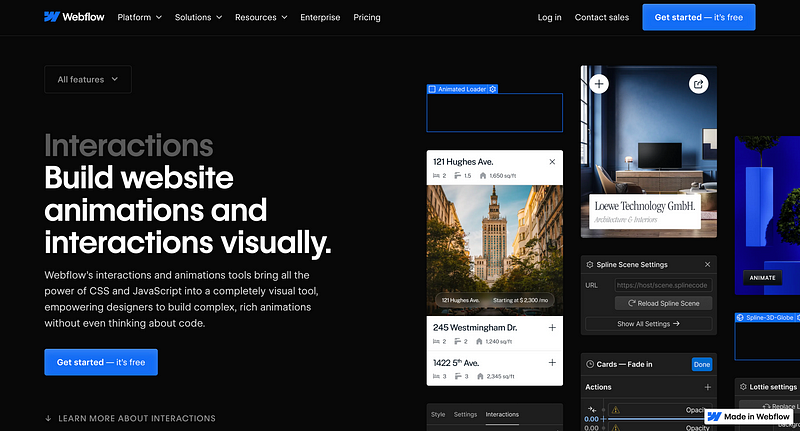
Webflow is a no-code platform that makes it easy to design, build, and launch responsive websites without writing a single line of code. Its built-in Interactions panel allows you to customize animations, transitions, and triggered events right from a visual editor.
Step 1: Identify Key Points of User Interaction
- Navigation Menus: Add a subtle color change or animation on hover so users know where they’re clicking.
- Lesson Completion Indicators: Animate a checklist or progress bar to reward course completion.
- Form Submissions & Quizzes: Provide instant feedback — like a quick checkmark or confetti effect — when a user submits a quiz or responds to a poll.
Step 2: Define Triggers and Animations in the Interactions Panel
- Page Scroll: Trigger animations when the user scrolls into a section (e.g., fade in instructional text).
- Hover: Highlight buttons or images when the user hovers over them, making them more clickable and interesting.
- Click: Animate elements on click, such as toggling a hidden module or revealing more detailed instructions.
In Webflow, simply navigate to the Interactions panel, choose an element you want to animate, and select the trigger (hover, click, page load, etc.). Then, customize the animation — like opacity, scale, or rotation — to create a micro-interaction that feels smooth and intuitive.
Step 3: Keep It Subtle and Purposeful
The key to micro-interactions is subtlety. Over-the-top animations can distract learners and slow site performance. A minimal fade, slide, or scale is often enough to signal a change without overwhelming the user. Stick to animations that serve a clear purpose, such as guiding user actions, rewarding progression, or providing feedback.
Best Practices for Effective Micro-Interactions
- Consistency: Use the same color palette, icon style, and animation speed throughout your platform. Consistency helps learners form habits and expectations.
- Accessibility: Ensure all visual cues are paired with non-visual feedback (e.g., textual or auditory prompts) for users with disabilities.
- Performance: Optimize images, videos, and animations so that micro-interactions don’t slow down page load times.
- Analytics Tracking: Monitor click-through rates, completion times, or engagement metrics to see if micro-interactions are making a measurable difference.
Conclusion
Micro-interactions are an ideal tool for niche e-learning platforms. They provide instant feedback, guide learners through complex material, and add delightful moments that enhance user satisfaction. Thanks to platforms like Webflow, creating these micro-interactions no longer requires advanced coding knowledge. With thoughtful planning and subtle design choices, you can elevate your e-learning experience — and keep your learners engaged from start to finish.
Some of the links in this article are affiliate