How to Build a Website Without Any Coding Experience
Are you ready to create a professional-looking website but worried about your lack of coding skills? Whether you’re a small business owner…
Are you ready to create a professional-looking website but worried about your lack of coding skills? Whether you’re a small business owner, a freelancer, or just someone eager to share your passion online, building a site from scratch can feel daunting — especially if you don’t have a background in web development. Fortunately, platforms like Webflow now make it possible to build a fully customised, responsive website without touching a single line of code.
In this beginner-friendly guide, we’ll walk you through what sets Webflow apart from other site builders, why it’s ideal for newcomers, and how you can get started.
1. What Is Webflow?
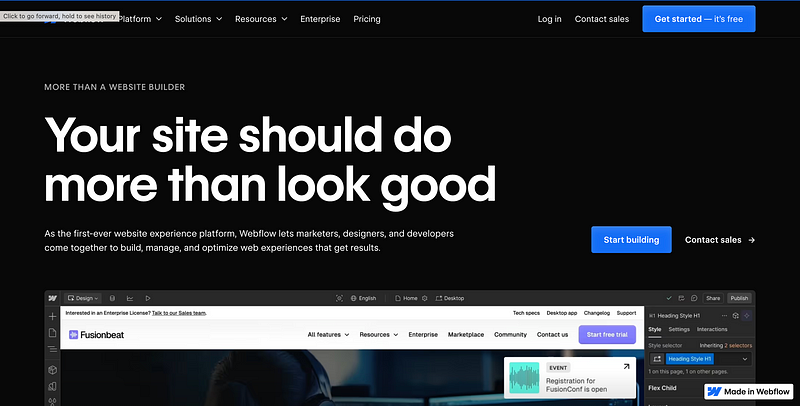
Webflow is a no-code platform that allows you to design, build, and launch websites using an intuitive visual editor. Instead of manually coding HTML, CSS, or JavaScript, you can drag and drop elements onto a canvas and see changes in real time. It’s the perfect solution for anyone who wants full control over their site’s look and functionality without the steep learning curve of traditional coding.
Key highlights of Webflow:
- Visual Designer: Create custom layouts without relying on templates.
- Responsive Builds: Ensure your site looks great on desktops, tablets, and smartphones.
- CMS Integration: Update and manage your site’s content easily with a built-in CMS.
- Interactions & Animations: Add dynamic animations without writing JavaScript.
2. Why Use Webflow Instead of Other Builders?
There are plenty of website builders out there — Wix, Squarespace, and WordPress, to name a few. So, why choose Webflow?
- Design Freedom
Some platforms limit how much you can customise your site. Webflow gives you near-complete control over your website’s layout and style, so you can create something truly unique. - No-Code, Yet Advanced
Even though you don’t need to code, Webflow goes beyond basic “drag-and-drop” by letting you adjust advanced styling (like padding, margins, and CSS classes) with simple visual controls. - Integrated Hosting & CMS
Hosting your website directly on Webflow is straightforward — no need for separate hosting services or confusing setup processes. Plus, you get an easy-to-use CMS for any blog, portfolio, or online collection. - Ecosystem & Support
Webflow boasts an active community and a wealth of tutorials, templates, and resources. If you ever get stuck, help is just a forum post or tutorial away.
3. Step-by-Step Guide to Creating Your First Site
Ready to dive in? Here’s a simplified roadmap to get started with Webflow.
- Sign Up
Head to the Webflow website and create a free account. You’ll get access to a dashboard where you can manage all of your projects. - Choose a Template or Start From Scratch
Webflow provides professionally designed templates if you’d like a quick start. Feeling ambitious? Launch a blank project and design every element yourself. - Familiarise Yourself With the Designer
Spend some time clicking around the visual editor. You’ll see panels for adding elements (text boxes, images, sections), styling them, and setting up responsive layouts. - Create Your Layout
Drag sections, containers, and elements onto the canvas. Adjust margins, colours, and fonts to match your style. Webflow automatically generates the necessary HTML/CSS behind the scenes. - Add Interactions & Animations (Optional)
Want to give your site more flair? Use Webflow Interactions to animate menus, buttons, or entire sections. This is a great way to make your site feel dynamic — no coding required. - Set Up Your CMS
If you plan to run a blog or showcase a portfolio, you can create a CMS collection (e.g., “Blog Posts,” “Projects”) in your Webflow dashboard. This allows you to add and update content easily. - Preview & Test Responsiveness
Switch between desktop, tablet, and mobile views in the designer to ensure everything looks great on every screen size. - Publish Your Site
Once you’re satisfied, hit “Publish.” You can publish to a free Webflow domain (yoursite.webflow.io) or connect your own custom domain.
4. Tips for Success
- Plan Your Content: Before you start designing, map out your site’s pages and content. Clear organization = better user experience.
- Keep It Simple: It’s easy to get carried away with animations and interactive elements. Start with a clean design so your audience can focus on what matters.
- Optimize Images: Large image files can slow down your site. Optimize and compress images before uploading.
- Use Webflow University: This free resource has tutorials and courses covering everything from basic site setup to advanced animations.
5. Final Thoughts
Building a professional website without any coding knowledge used to be a pipe dream. But thanks to platforms like Webflow, anyone can launch a custom, responsive site that reflects their brand or personality. Whether you’re a small business, a creative freelancer, or just someone with a story to tell, you now have the power to make a mark on the web — no developers needed.
Ready to get started?
Click on Webflow and sign up for free. Explore the tools, experiment with the visual designer, and watch your idea come to life — one drag-and-drop at a time!
Some of the links in this article are affiliate