10 Email Deliverability Best Practices for 2025

For solo founders and small marketing teams, every email sent is a potential conversation, conversion, or crucial connection. But if those carefully crafted messages land in the spam folder, you're essentially shouting into the void. The difference between a thriving email channel and a failed one often comes down to one critical factor: deliverability. Getting this right isn't just a technical task; it's a fundamental business requirement for growth.
This guide is not about abstract theory. It’s a practical, step-by-step playbook covering the essential email deliverability best practices you need to implement today. We will turn complex-sounding acronyms like SPF, DKIM, and DMARC into simple, actionable checklists. You'll learn how to build and maintain a pristine sender reputation, ensuring your messages are welcomed by inbox providers like Gmail and Outlook, not flagged as a threat.
Think of this as your definitive roadmap to the inbox. We will cover everything from the foundational pillars of email authentication to the nuances of list hygiene, content optimization, and reputation monitoring. Each point is designed to provide lean, effective workflows that deliver measurable results, perfect for founders and creators who need to maximize their impact with limited time and resources. By following these steps, you'll stop guessing why your open rates are low and start building a reliable communication channel that directly fuels your business. Instead of fighting for visibility, your emails will finally get the attention they deserve, consistently reaching the people who matter most.
1. Master the Essentials: Implement SPF (Sender Policy Framework)
Think of SPF as your domain's official list of authorized senders. It's a foundational email authentication protocol that prevents cybercriminals from sending emails under your domain name, a practice known as spoofing. By implementing SPF, you provide a public record that mailbox providers can check to verify an email's origin, making it a crucial first step in building a trustworthy sender reputation and a core component of email deliverability best practices.
How SPF Works and Why It’s Critical
SPF operates through a special DNS TXT record. When you send an email, the recipient's mail server performs a quick DNS lookup to check your domain's SPF record. This record contains a list of IP addresses or domains permitted to send email on your behalf. If the sending server's IP address is on that list, the email passes the SPF check. If it's not, the server can flag the email as suspicious or reject it outright, protecting both your brand's reputation and your recipients.
Key Insight: Without SPF, anyone can send emails that appear to come from your domain. This not only opens your audience up to phishing attacks but also directly harms your deliverability, as ISPs will penalize your domain for the spammy activity.
Actionable Steps for Implementation
Implementing SPF is a straightforward process you can typically complete in minutes through your domain registrar or DNS provider (like GoDaddy, Namecheap, or Cloudflare).
- Identify Your Senders: Make a list of all services that send email for your domain. This includes your email marketing platform (e.g., Brevo), your transactional email service, and your primary mailbox provider (e.g., Google Workspace, Microsoft 365).
- Construct Your Record: Your SPF record is a single line of text. It starts with
v=spf1and includesinclude:mechanisms for third-party services andip4:orip6:for specific IP addresses. - Publish the DNS Record: Log into your DNS provider and create a new TXT record for your root domain (e.g.,
yourdomain.com). Paste your constructed SPF string into the value field.
A common example for a business using Google Workspace and Brevo might look like this:
v=spf1 include:_spf.google.com include:sendinblue.com ~all
The ~all at the end is a "softfail" qualifier, which tells receiving servers to accept but mark messages from unauthorized senders. This is a safe starting point, which can later be changed to -all (hardfail) for stricter enforcement.
2. Configure DKIM (DomainKeys Identified Mail)
If SPF is your domain's authorized sender list, DKIM is its tamper-proof seal. This email authentication method adds a unique digital signature to every email you send, verifying that the message content hasn't been altered in transit. By implementing DKIM, you assure mailbox providers that the email they received is exactly what you sent, which is a critical step in proving your legitimacy and improving your sender reputation as part of your overall email deliverability best practices.
How DKIM Works and Why It’s Critical
DKIM uses a cryptographic key pair: a private key kept on your sending server and a public key published in your DNS. When an email is sent, the server creates a unique signature by hashing parts of the message (like the "From" header and the body) with the private key. The recipient's mail server then uses the public key from your DNS record to verify this signature. A successful match proves the email is authentic and its content is unchanged.
Key Insight: DKIM protects against sophisticated "man-in-the-middle" attacks where an email's content could be maliciously altered after leaving your server. Without it, your legitimate messages could be flagged as threats, severely damaging your domain's credibility with major inbox providers like Gmail and Outlook.
Actionable Steps for Implementation
Most email service providers, like Brevo or SendGrid, simplify DKIM setup by providing the necessary records for you to publish in your DNS.
- Generate Your DKIM Record: In your email sending service's dashboard, navigate to the domain authentication or sender settings. The platform will generate a unique DKIM record, which is a TXT record containing a hostname (the "selector") and a value (the public key).
- Publish the DNS Record: Copy the generated hostname and value. Log into your DNS provider (e.g., Cloudflare, GoDaddy) and create a new TXT record. Paste the hostname and value into the corresponding fields.
- Verify the Configuration: Return to your email service provider and click the "verify" or "authenticate" button. It may take a few hours for DNS changes to propagate, but once verified, your outgoing emails will be DKIM-signed.
A typical DKIM record provided by an ESP might look something like this:
Hostname: mail._domainkey.yourdomain.com
Value: v=DKIM1; k=rsa; p=MIGfMA0GCSqGSIb3DQEBAQUAA4GNADCBiQ...
The p= part contains the long public key string. Always copy the full values exactly as provided by your sending platform.
3. Set Up DMARC (Domain-based Message Authentication, Reporting and Conformance)
If SPF is your list of authorized senders and DKIM is your tamper-proof seal, DMARC is the security guard who enforces the rules. It builds upon SPF and DKIM, allowing you to tell mailbox providers exactly what to do with emails that fail authentication checks. By deploying DMARC, you gain unprecedented visibility into your email ecosystem and take the final step to fully lock down your domain against spoofing and phishing attacks.
How DMARC Works and Why It’s Critical
DMARC operates through a DNS TXT record that sets a policy for unauthenticated mail. When an email arrives, the receiving server checks for a DMARC policy on the sender's domain. It then verifies if the email passes SPF and/or DKIM checks and if the domain used in those checks aligns with the "From" address. Based on your DMARC policy (p=), the server will either monitor (none), quarantine (quarantine), or reject (reject) the message. This makes it a non-negotiable part of modern email deliverability best practices.
Key Insight: DMARC's reporting feature is its superpower. It sends you aggregate reports detailing which services are sending email on your behalf, whether they are authenticating correctly, and how mailbox providers are treating your messages. This data is invaluable for identifying unauthorized senders and fixing authentication issues.
Actionable Steps for Implementation
Implementing DMARC is a phased process that requires careful monitoring. You'll start with a passive policy and gradually increase its strictness as you gain confidence in your email authentication setup.
- Ensure SPF and DKIM are in place: DMARC relies on SPF and DKIM to function. Confirm they are correctly configured for all your sending services before proceeding.
- Start with a Monitoring Policy: Begin by publishing a "p=none" policy. This allows you to gather data and identify all legitimate email streams without impacting mail flow. This is the safest starting point.
- Publish the DNS Record: In your DNS provider, create a new TXT record for
_dmarc.yourdomain.com. Paste your DMARC string into the value field.
A starter policy to begin collecting data might look like this:
v=DMARC1; p=none; rua=mailto:dmarc-reports@yourdomain.com
The p=none tag ensures no emails are rejected, while rua=mailto: specifies where to send the aggregate reports. After analyzing these reports and ensuring all legitimate sources are authenticated, you can slowly progress to p=quarantine and finally p=reject for maximum protection.
4. Maintain Clean Email Lists and List Hygiene
Sending emails to a stale or invalid list is one of the fastest ways to damage your sender reputation. Email list hygiene is the practice of regularly cleaning your subscriber database to remove invalid addresses, hard bounces, and disengaged contacts. This process ensures you're sending to people who want to hear from you, which directly boosts engagement, reduces spam complaints, and improves your overall deliverability.

How List Hygiene Works and Why It’s Critical
Internet Service Providers (ISPs) closely monitor how recipients interact with your emails. When you consistently send to non-existent email addresses (hard bounces) or subscribers who never open your messages, ISPs see this as a sign of poor list management or even spamming. Over time, these negative signals cause your sender score to drop, leading to more of your emails landing in the spam folder. Maintaining a clean list is a fundamental email deliverability best practice that keeps your engagement rates high and your sender reputation positive.
Key Insight: A smaller, engaged email list is always more valuable than a large, unengaged one. Focusing on quality over quantity not only improves deliverability but also leads to higher conversion rates and a better return on your email marketing investment.
Actionable Steps for Implementation
Proactive list hygiene is a continuous process, not a one-time task. Integrating these steps into your regular email marketing workflow will protect your sender reputation and maximize campaign effectiveness.
- Implement Double Opt-In: Require new subscribers to confirm their email address by clicking a link in a verification email. This prevents typos and ensures every new contact is valid and engaged from the start.
- Remove Hard Bounces Immediately: Configure your email service provider to automatically remove hard bounces after the first failed delivery attempt. These are permanent delivery failures, and continuing to send to them is a major red flag for ISPs.
- Segment and Re-engage Inactive Subscribers: Create a segment of subscribers who haven't opened your emails in the last 6-12 months. Send them a targeted re-engagement campaign to win them back. If they still don't engage, remove them from your active list.
- Use an Email Validation Service: Before a major campaign or when importing a new list, use a tool like Bouncer to verify the addresses. This service scrubs your list of invalid emails, typos, and potential spam traps before you hit send.
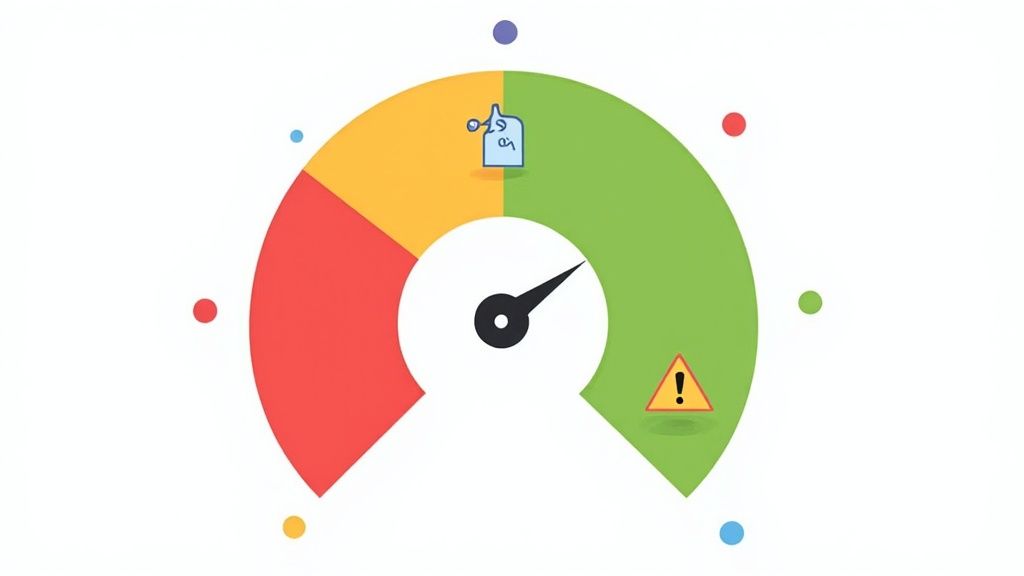
5. Monitor and Maintain Sender Reputation
Think of your sender reputation as a credit score for your email domain. It's a critical metric that Internet Service Providers (ISPs) like Gmail and Microsoft use to decide whether your emails land in the inbox, spam folder, or get blocked entirely. This score is calculated based on your sending history, authentication compliance, bounce rates, complaint rates, and recipient engagement, making its active management one of the most vital email deliverability best practices.
How Sender Reputation Works and Why It’s Critical
Every time you send an email, ISPs are watching. They track how recipients interact with your messages: Do they open them? Do they mark them as spam? Are your emails bouncing? This data is compiled to create a reputation score for both your sending IP address and your domain. A high score tells ISPs you're a trustworthy sender, while a low score signals you might be a spammer, leading to aggressive filtering and poor deliverability.
Key Insight: Your sender reputation is not static; it's a dynamic score that changes with every campaign you send. Neglecting to monitor it is like flying blind. A sudden drop can cripple your email marketing efforts overnight, often without any direct notification.
Actionable Steps for Implementation
Proactively managing your sender reputation involves using specialized tools and consistently monitoring key metrics. This ensures you can catch and resolve issues before they cause lasting damage.
- Use Postmaster Tools: Register your domain with free services like Google Postmaster Tools and Microsoft's Sender Network Data Services (SNDS). These platforms provide direct insight into how major ISPs view your domain's reputation, including data on spam rates, IP reputation, and authentication success.
- Check Blacklists Regularly: Routinely check if your domain or IP has been listed on any major DNS-based blacklists (DNSBLs) using tools like MXToolbox. Getting listed can instantly block your emails.
- Analyze Campaign Metrics: Pay close attention to your bounce rates, complaint rates, and unsubscribe rates after every send. High bounce rates (over 2%) or complaint rates (over 0.1%) are clear red flags that you need to investigate your list hygiene or content strategy. For a deeper dive into tools that can help manage outreach, see this guide on the best cold email software for B2B outreach in 2025.
6. Implement Proper List Building and Opt-In Practices
The foundation of high email deliverability isn't your email server; it's the quality of your subscriber list. Proper list-building and opt-in practices ensure that every person on your list explicitly consented to receive your emails. This approach directly translates into higher engagement, fewer spam complaints, and a stronger sender reputation, making it one of the most impactful email deliverability best practices.
How Opt-In Works and Why It’s Critical
Opt-in mechanisms are the formal process through which a user gives you permission to email them. The most effective method is the double opt-in, where a user first signs up via a form and then must click a confirmation link in a verification email to be added to your list. This two-step process confirms the email address is valid and that the owner genuinely wants to subscribe, drastically reducing bounce rates and spam complaints from the outset.
Key Insight: A list built with single opt-in or, worse, without explicit consent, is a ticking time bomb for your sender reputation. Even a small percentage of recipients marking your emails as spam can cause mailbox providers like Gmail and Outlook to start filtering all your messages to the junk folder.
Actionable Steps for Implementation
Implementing a robust opt-in strategy is about creating clear, transparent, and user-friendly subscription paths. This not only improves deliverability but also builds trust with your new subscribers from the very first interaction.
- Choose Double Opt-In: Configure your email service provider (like Brevo or ConvertKit) to use double opt-in for all new subscribers. This is the gold standard for list quality.
- Optimize Your Confirmation Email: Ensure the confirmation email is sent immediately after sign-up (within 5 minutes). Keep the subject line clear (e.g., "Action Required: Confirm Your Subscription") and the call-to-action button prominent.
- Provide Clear Unsubscribe Links: Every email you send must have a visible and easy-to-use unsubscribe link. Hiding this link encourages frustrated users to hit the "mark as spam" button instead, which is far more damaging to your reputation.
- Document Consent: Keep a record of how and when each subscriber opted in. This includes the date, time, IP address, and the specific form they used. This documentation is crucial for compliance with regulations like GDPR and CAN-SPAM.
7. Optimize Email Content and Formatting
Beyond authentication, the very construction of your email plays a huge role in its journey to the inbox. Mailbox providers scrutinize email content and code for signs of spam or malicious intent. Optimizing your email's content and formatting ensures it not only passes these automated checks but also renders perfectly across different devices and clients, which is a fundamental component of modern email deliverability best practices.
How Content and Formatting Impact Deliverability
ISPs use sophisticated filters that analyze everything from your subject line to your HTML code. Issues like broken HTML, excessive image-to-text ratios, suspicious links, and "spam trigger" words can all raise red flags. A poorly formatted email that looks broken or unprofessional on a popular client like Gmail or Apple Mail can also lead to recipients marking it as spam, directly damaging your sender reputation.
Key Insight: Your email's design isn't just about aesthetics; it's a technical signal of legitimacy. Clean, responsive code and balanced content tell mailbox providers that you are a professional sender, while sloppy formatting and spammy language suggest otherwise.
Actionable Steps for Implementation
Creating emails that are both beautiful and deliverable is a balancing act. Tools like Stripo or the MJML framework can simplify building responsive emails, but the core principles remain the same.
- Maintain a Healthy Text-to-Image Ratio: Avoid sending emails that are just one large image. Spam filters can't "read" images and often view such emails with suspicion. Aim for a balanced mix, typically around 80% text to 20% images.
- Include a Plain-Text Version: Always provide a plain-text alternative to your HTML email. This is crucial for accessibility and is a strong positive signal for spam filters. Most email service providers automate this, but it's wise to double-check.
- Code for Compatibility: Use clean, semantic HTML and stick to web-safe fonts. Keep your email width around 600px for optimal viewing on most devices. Before sending, use a testing service like Litmus to see how your email renders across different clients.
- Avoid Spam Trigger Words: Words like "free," "winner," "act now," or excessive use of exclamation points and all-caps can land your message in the junk folder. You can learn more about how to write effective personalized cold emails that avoid these common pitfalls while still driving engagement.
8. Segment and Personalize Email Campaigns
Sending a generic email blast to your entire list is one of the fastest ways to damage your sender reputation. Segmentation is the practice of dividing your email list into smaller, more focused groups based on specific criteria. By sending personalized, relevant content to these segments, you drastically increase engagement, which signals to mailbox providers that your emails are wanted and valuable. This positive feedback loop is essential for maintaining strong email deliverability best practices.
How Segmentation Works and Why It’s Critical
Instead of a one-size-fits-all approach, segmentation allows you to tailor your message to subscribers' interests, behaviors, and demographics. Mailbox providers like Gmail and Outlook closely monitor how recipients interact with your emails. High open rates, click-through rates, and replies boost your reputation, while high unsubscribe rates and spam complaints damage it. Segmented campaigns consistently outperform generic ones because the content is more relevant to the recipient, leading to better engagement metrics.
Key Insight: ISPs reward relevance. When you send a targeted email that a specific segment finds useful, they engage with it. This engagement tells the ISP that you are a legitimate, high-quality sender, which directly improves your chances of landing in the inbox for future campaigns.
Actionable Steps for Implementation
Most modern email service providers, including platforms like Brevo, have built-in tools to make segmentation easy. The key is to think strategically about how to group your audience for maximum impact. A detailed comparison of how platforms like these handle segmentation can provide deeper insights for creators and solo founders. Learn more about choosing an email platform for your needs.
- Segment by Engagement: Create segments for your most active subscribers (e.g., opened in the last 30 days), those at risk of churning, and inactive users. Send your best content to the active group and run re-engagement campaigns for the others.
- Segment by Subscriber Data: Use data you've collected to create groups based on interests, purchase history, or location. For example, an e-commerce store can send a promotion for winter coats only to subscribers in colder climates.
- Implement Behavioral Triggers: Set up automated emails based on user actions. A welcome series for new subscribers, an abandoned cart reminder, or a follow-up based on a link click are all powerful forms of behavioral segmentation that drive high engagement.
9. Use Authentication Headers and Email Standards
Think of email headers as the digital passport for your messages. They contain critical routing and authentication information that mailbox providers scrutinize to verify an email's legitimacy. Adhering to established email standards (like RFC 5322) ensures your headers are formatted correctly, which is a fundamental aspect of email deliverability best practices that directly impacts how your emails are processed and delivered.
How Headers Work and Why They’re Critical
Every email you send is composed of a body (the content you see) and headers (the metadata used by servers). These headers contain fields like From, To, Date, Subject, and Message-ID. Proper headers provide a clear, verifiable trail for mailbox providers, helping them distinguish your legitimate communications from spam or phishing attempts. Incorrect or non-compliant headers can cause validation failures, leading to your emails being filtered or rejected before they ever reach the inbox.
Key Insight: Little-known but crucial headers, like the List-Unsubscribe header, are not just best practices; they are often requirements for major mailbox providers. Failing to include them can lead to immediate deliverability penalties and a damaged sender reputation.Actionable Steps for Implementation
Most Email Service Providers (ESPs) like Brevo handle the technical side of header generation. However, you can and should ensure your configurations and practices align with best standards.
- Implement List-Unsubscribe Headers: This is a non-negotiable for bulk email. The header provides a one-click unsubscribe option within the email client's interface, a requirement for providers like Gmail and Yahoo. It reduces spam complaints, which are highly damaging to your reputation.
- Set a Proper Return-Path: Also known as the "bounce address," the
Return-Pathheader specifies where non-delivery reports (bounces) should be sent. Proper configuration is essential for list hygiene, as it allows you to identify and remove invalid addresses. - Use a Recognizable "From" Address: Ensure your
From:address is tied to the domain you are sending from and authenticated with SPF/DKIM. An address likenoreply@yourdomain.comcan hurt engagement, but a clear one likenathan@yourdomain.combuilds trust. - Validate Your Headers: Use email testing tools to inspect your headers before launching a campaign. These tools can flag missing fields, formatting errors, or other issues that could negatively affect your deliverability.
10. Implement Feedback Loops and Monitor Complaints
A feedback loop (FBL) is a direct line of communication from an Internet Service Provider (ISP) to you, the sender. It’s a critical service that notifies you whenever a subscriber marks one of your emails as spam. By implementing FBLs, you gain invaluable insight into recipient sentiment, allowing you to quickly remove dissatisfied contacts from your list and protect your sender reputation from the damaging impact of high complaint rates. This is a non-negotiable step for maintaining strong email deliverability best practices.
How Feedback Loops Work and Why They’re Critical
When a recipient clicks the "This is Spam" button, the ISP (like Gmail or Outlook) can forward a redacted copy of that complaint back to you through the FBL program. This allows your email service provider to automatically unsubscribe the user, preventing future emails and subsequent complaints from the same person. Without this system, you would continue sending to an unengaged and annoyed recipient, accumulating spam complaints that ISPs use as a major signal to filter your future campaigns into the spam folder.
Key Insight: Spam complaints are one of the most significant negative metrics affecting your sender reputation. Actively monitoring them through FBLs is a proactive measure to keep your complaint rate below the industry-accepted threshold of 0.1% (1 complaint per 1,000 emails sent).
Actionable Steps for Implementation
Most top-tier email service providers, like Brevo, manage FBL registrations and complaint processing on your behalf. However, if you manage your own sending infrastructure, you'll need to set it up manually.
- Register with Major ISPs: Sign up for FBL programs with all major mailbox providers. Key ones include the Gmail Feedback Loop, Microsoft’s Junk Mail Reporting Program (JMRP), and Yahoo's Complaint Feedback Loop.
- Configure Your Systems: Set up a dedicated email address (e.g.,
abuse@yourdomain.com) to receive the FBL reports. You will need to process these reports, which are typically in a standardized Abuse Reporting Format (ARF). - Automate Suppression: The most crucial step is to create an automated process that parses these FBL reports and immediately adds the complaining recipient's email address to your suppression list. This ensures they never receive another email from you.
- Monitor Complaint Rates: Regularly check your complaint rate within your email sending platform's analytics. Investigate any sudden spikes, as they may indicate a problem with a specific email campaign, a new list segment, or a recent change in your sending practices.
Email Deliverability: 10 Best Practices Comparison
| Item | Implementation complexity | Resource requirements | Expected outcomes | Ideal use cases | Key advantages |
|---|---|---|---|---|---|
| Implement SPF (Sender Policy Framework) | Low — add/maintain DNS TXT record | DNS access, list of sending IPs, basic validation tools | Reduces spoofing and some phishing, improves sender reputation | Small-to-medium domains, single or limited sending services | Easy, no cost, widely supported |
| Configure DKIM (DomainKeys Identified Mail) | Medium — key generation, mail-server signing, DNS publishing | Key management, DNS access, mail server/ESP config, testing tools | Verifies message integrity and origin; improves deliverability | Transactional email, high-volume senders, brand-sensitive mail | Strong cryptographic authentication, protects message tampering |
| Set Up DMARC (Domain-based Message Authentication, Reporting and Conformance) | Medium–High — requires SPF/DKIM alignment and policy tuning | DMARC DNS record, reporting tools, monitoring/analysis resources | Prevents domain spoofing, provides aggregate/forensic reports, enforces actions | Enterprises, finance, high-risk brands, fraud prevention | Policy control over failures + visibility via reports |
| Maintain Clean Email Lists and List Hygiene | Medium — ongoing processes and validation workflows | Email validation services, CRM/ESP integration, staff time | Lower bounces/complaints, improved deliverability and ROI | Regular email marketing, e-commerce, large subscriber bases | Improves engagement and reduces ISP blocking |
| Monitor and Maintain Sender Reputation | Medium — continuous monitoring and remediation | Reputation & blacklist tools, analytics, operational monitoring | Early detection of deliverability issues; sustained inbox placement | High-volume senders, multiple IPs, ESPs | Proactive issue identification and faster remediation |
| Implement Proper List Building and Opt-In Practices | Medium — setup of consent flows and confirmation processes | Signup systems, double opt-in, legal/compliance support | Higher-quality subscribers, lower complaints, regulatory compliance | Subscription services, regulated industries, long-term lists | Better engagement, legal compliance, reduced spam traps |
| Optimize Email Content and Formatting | Medium–High — coding, responsive design, extensive testing | Designers/developers, testing tools (Litmus, Email on Acid), templates | Fewer spam triggers, consistent rendering, higher engagement | Marketing campaigns, mobile-heavy audiences, complex templates | Improves deliverability, rendering consistency, accessibility |
| Segment and Personalize Email Campaigns | Medium–High — data collection and segmentation logic | Advanced ESP, analytics, user data, content automation | Higher open/click rates, lower unsubscribes, improved ROI | Targeted marketing, lifecycle automation, e-commerce | Increased relevance and engagement, better sender metrics |
| Use Authentication Headers and Email Standards | Medium — correct header/config implementation | Technical knowledge, platform access, validation tools | Better ISP validation, proper bounce handling, fewer filters | Bulk senders, platforms integrating multiple services | Standards compliance improves deliverability and compatibility |
| Implement Feedback Loops and Monitor Complaints | Medium — register with ISPs and automate complaint handling | ISP FBL registrations, automated suppression, reporting tools | Rapid suppression of complainers, reduced ISP blocks | High-volume senders, ESPs, teams tracking complaint rates | Early warning system and automated complaint remediation |
Do This Next: Your 30-Minute Deliverability Quick Start
We’ve navigated the complex, technical landscape of email deliverability best practices, from foundational authentication protocols like SPF, DKIM, and DMARC to the nuanced arts of list hygiene and content optimization. Theory and understanding are crucial, but the real momentum comes from immediate, focused action. This final section isn't just a summary; it's your launchpad.
The difference between an email program that struggles and one that thrives lies in consistent, proactive management. It’s about transforming these best practices from a checklist of one-time tasks into a system of repeatable habits. By dedicating small pockets of time to monitoring and maintenance, you build a powerful, resilient email engine that consistently reaches the inbox and drives tangible results for your business, whether that's client acquisition, product sales, or audience engagement.
Key Insight: Mastering email deliverability isn't a single event, it's a continuous process of small, strategic actions. The goal is to make these practices a routine part of your marketing workflow, not a frantic reaction to a sudden drop in open rates.
Your 30-Minute Action Plan
Feeling overwhelmed? Don't be. You can make a meaningful impact on your sender reputation in the time it takes to drink a cup of coffee. Here is a hyper-focused, three-step action plan to execute right now.
- Run a Full Authentication Diagnostic (10 Minutes):
- Action: Go to a free diagnostic tool like MXToolbox and enter your sending domain.
- What to Look For: Specifically check your SPF, DKIM, and DMARC records. Does your SPF record have a "pass" result? Is your DKIM signature valid? Is a DMARC record present, even if it's just a basic
p=nonepolicy? - Next Step: Document any errors or "fail" results. Finding a missing DKIM record or an invalid SPF entry is your first, most critical fix. You can often find step-by-step guides from your email service provider to correct these DNS entries.
- Check Your Current Reputation Scorecard (10 Minutes):
- Action: Sign in to Google Postmaster Tools with your Google account and add your sending domain. If you've already done this, review your dashboards.
- What to Look For: Pay close attention to your IP and Domain Reputation. Are they rated "High," or are they trending toward "Medium" or "Low"? Check your Spam Rate dashboard for any recent spikes.
- Next Step: A "Low" reputation is an immediate red flag. Correlate any spam rate spikes with recent email campaigns. This tells you which content or list segment might be causing issues, giving you a clear starting point for troubleshooting.
- Perform a Proactive Content Spam Check (10 Minutes):
- Action: Take the subject line and body copy from your most recent email broadcast. Paste it into a free spam checker tool (many are available online).
- What to Look For: The tool will flag potentially problematic words ("free," "act now"), excessive capitalization, or formatting issues that spam filters dislike.
- Next Step: Rewrite the flagged sections. For example, instead of "CLICK HERE to get your FREE guide," try "Get your complimentary guide." This simple habit will train you to write cleaner, more deliverable copy for every future campaign.
From Checklist to Competitive Advantage
Completing this 30-minute audit is your first step toward transforming your email deliverability from a liability into a powerful asset. Each of these email deliverability best practices contributes to a singular, vital goal: building trust with inbox providers. When mailbox giants like Gmail and Outlook trust that you are a legitimate sender providing value, they reward you with preferential inbox placement.
This isn't just about avoiding the spam folder. It's about ensuring your product launches are seen, your client proposals are received, and your community updates are read. By making these small workflows a part of your operational rhythm, you are building a more predictable, scalable, and profitable business. Now, go take action.